On paper a portfolio looks like a very simple project. There are only a few pieces of leather and one piece of hardware. It should not be that hard but there were several small issues that had to be solved along the way. Also when making a pattern from scratch you spend a fair amount of time adjusting it trying to figure out the dimensions. I will of course include the pattern so you (and I) don't have to spend the time doing that again.
I will not go into details about sewing, burnishing and riveting. To see how I do this please take a look here:
Burnishing
Sewing
Riveting
Materials
- 2,5mm shoulder for the main part (I used colored veg tanned shoulder in dark racing green from metropolitan leather)
- 1,5 mm shoulder for the gusset
- Document case lock
- Lin cable 432 - pine
- Contact cement
Making the pattern
The dimensions I was going for was 38cm x 26cm x 3 cm (width x height x depth). I hit these pretty well as the final bag is:
I used thick paper to create the pattern and came up with something that I was happy with. I know from experience that the dimensions taken from the pattern will not be
spot on as the relatively thin paper does not behave similar to leather. Therefore I make sure to add extra material when I cut the leather. In this case it means cutting the
main piece longer. The width of the bag does not change from paper to leather.
Sometimes I use a staple gun to connect the paper but I prefer paper clips as it is much easier to make quick changes along the way.
Gusset
the gusset on this folio is something new to me and I have not been able to find any guide making something similar. It is very simple but gives the bag a nice almost pointy bottom as oppose to a more round appearance which seems to be the norm. For a rounded bottom the end of the gusset would also need to be rounded.
I made a small mock up to see how it would work. This was a good idea because two problems appeared right away. It was not possible to have the two ends of the gusset meet. No matter how hard I tried there always came a gap. The only solution I could think of was to sew the gusset together but it had to be done very close to the edge. When I made a mock up of this the leather did not rip apart but held up nicely. The strength of leather always amazes me!
The end of the gusset is cut to a 45 degree angle to make them fit better together when sewn.
It is pretty simple to sew the bottom of the gusset. The holes should be just where the 45 degree angle ends.
I laid the gusset next to the main piece to mark where it ends. I use this mark to know where to begin the pricking marks.
First test showed that a gap formed between the two ends of the gusset.
bevel the tops
cut the bottom at a 45 degree angle
it worked much better than I thought
Dye the ends with black and give the a light burnish.
Place the gusset next to the main piece
press the ends together and sew as close to the edge as possible,
Ready to be sewn on
here you see the stitches.
Next time I think I will add contact cement in the end.
Main piece
One end of the main piece needs to be cut so that it forms the flap. I made a template and used that to scribe a line which I then cut with the round knife. Before cutting mark the center(this will make it easier to position the hasp) A line for the stitches is marked around 3mm from the edge and all the edges are beveled.The marking of the stitches begins in the center of the gusset as shown in the "gusset" step.To determine where the lock should be positioned I assembled the bag with paper clamps and marked the leather. This step sounds simple be it actually takes some time. You go back and forth moving the flap up and down to see what works best. Also the length of the main piece was cut to long so this had to be trimmed as well.
To make the hasp fit the flap the tip as to be cut flat. Take off a little at a time so you dont end up taking too much off. Lay the hasp and mark the holes with either a awl or a small round punch.
Before you rivet the hasp in place you should burnish the flap and the top edge.
The hole for the lock is easy to mark if you have the back plate. At this point I had already covered it in leather and did not want to take it out again. Therefore I just measured the lock and made some cutting lines.The hole is easy to cut but the indents for the rivets are a real pain. I used a combination of round punches and a knife to make them.
I used the round knife for the cutting.
Before cutting mark the center. This makes it easier to position the lock later on.
scribe a line for the stitching holes
bevel the edge
Start from where the gusset ends.
Mark all the way around.
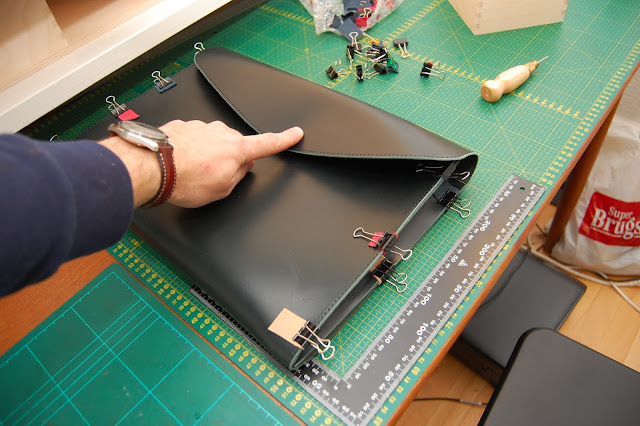
To figure out where the lock should be places I assembled the bag using paper clips.
Hold the lock in place and set a mark.
The small plastic bag makes sure that the lock does not scratch the leather
Holes marked for the hasp. Note the flat section on the flap
Ready for cutting.
It is not pretty but it will never be seen.
Lock
I spend some time figuring out how to attach the lock. The easy way is to attach a piece of leather on the back and sew it in place. This however shows the stitches and on this bag I wanted a more sleek look. You could just glue the leather on the back in place but I had doubts whether or not it would hold up in the long run. I then had an idea to cover the back plate with thin leather. I made a quick test with some paper which looked like it might work. I then skived down some leather, made it wet and wrapped it around the back plate. When the leather had dried I cut holes for the rivets and set the rivet.It does not look bad with the stitching going around it it just not the look I want
here you see the back plate
The skiving begins
Cut it in a circle
The edges are skived very thin.
You need to make smalle cuts all the way around. This only shows the first cut.
All folded up
trim the rivet
And set the rivet.
Gluing, Sewing and Burnishing
Before the sewing can begin you need to glue the gussets in place. I sand the edges and apply contact cement.Wax paper is really handy to make sure that nothing sticks before you want it to. I used it when I attached the gusset.
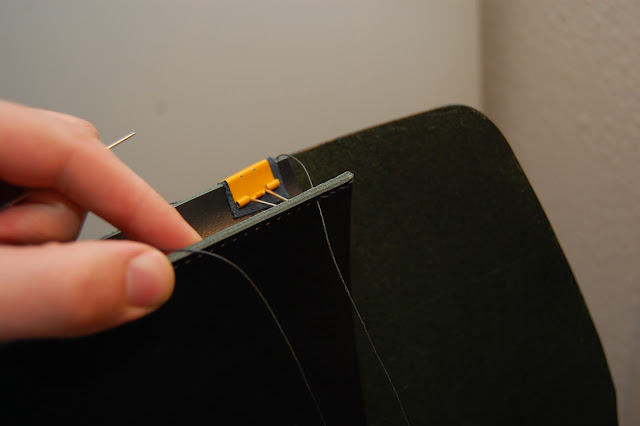
Sewing starts with the two gussets and ends with the flap. On the flap the holes for the hasp are in the way of the stitching. As you can see I just skipped the two stitches where the holes are.
rough up the edges and apply contact cement
Slowly remove the wax paper
Put a paper clip here to prevent it coming loose
Begin the sewing here
End it here. Do not cut off the threads before you have sewn over the last few stitches with the thread that goes around the flap
the holes for the hasp are right where the sewing holes are.
just skip the stitch and make sure that the rivets still fit.


I thank you very much for your website and effort. You provide valuable information. Tomas Linger www.tomaslinger.cz
ReplyDeleteExcellent great job covering the back of the lock, I like this look better without the stitching, maybe try it on your next briefcase...
ReplyDeleteThank you. It does give the bag a more sleek look. If I were to do it again I might just glue it in place like normal and leave out the stitching. If you use the right glue it should hold up without any problems. The glue I used in the past just wasn't that good but I have later changed to a better brand.
Delete