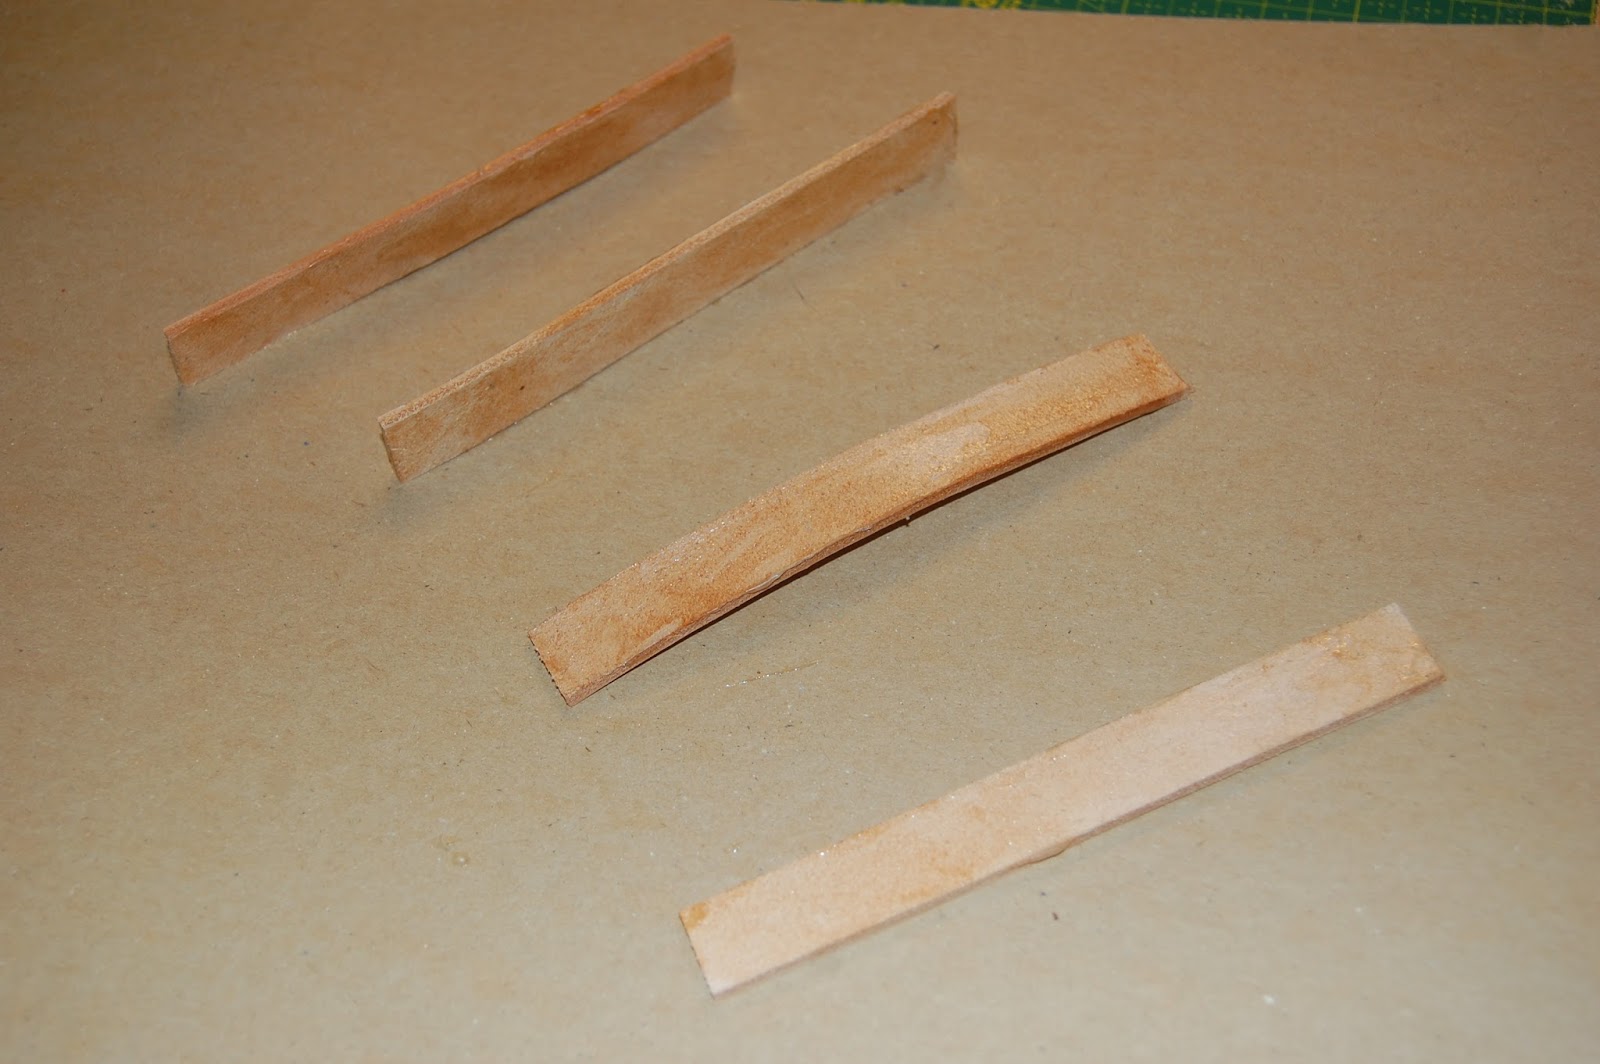
The handle is made by wrapping a leather filler with another piece of leather. Use contact cement to glue together pieces of leather 1,5 cm wide and 14 cm long to the combined thickness is around 1 cm.
You can then mark the filler with guidelines. Start by cutting the sides and then the top and bottom. With the basic shape done you now begin to round the edges with whatever method you wish. I used a safety beveler for the most parts and finished off with coarse sandpaper.
The filler was cut to long to begin with. Therefore the ends needs to be trimmed the the correct length.
With the filler done we can begin the handle cover. Mark the leather with all the lines from the pattern then cut the semicircles and skive the ends. Also but 3 grooves where they need to be bend. The edges in the curve needs to be burnished and dyed now as it is much easier before the D-ring is in place.
Submerge the handle cover and attached the D-rings. Put in the filler and start the sharpening with your thumbs. I do not have a wide smooth pliers so I attached leather to a regular pliers. You press in the sides against the filler so that you get a flat edge along the sides for the stitching. Also you curve the handle.
You can now apply contact cement to the wet leather and when the cement is dry glue the handle together. Next time I think I will wait until the leather has dried before applying the contact cement.
With the handle glued together trim off the sides, sand it, bevel it and burnish it.
I actually made 2 handles. The first one did not work out. I had made it too long and it was not possible to shorten it. Also the filler was too big so it would not have worked anyway.
Prepare the number of pieces required to get a total thickness of 1 cm. Put contact cement on them and let them dry.
The roller is a great tool for applying pressure after gluing
Use wing divider to mark 3,5 mm from the edge (at the end)
Use ruler and awl to mark the cutting lines.
I use a round knife for this cut. It works great.
First few cuts went fine.
Lines marked on the sides with a pen.
I used a skiving knife for this but a safety beveler would be just as good.
Rough cut out done. Now the edges can be rounded
I used the safety beveler to round the edges. I hold the filler in my hand and use the beveler as is if it was a potato peeler
Final shape top view. The ends have been cut to length and rounded as well
And a side view. It is a bit warped but that does not matter.
Handle cover cut out.
To help with the bend make 3 grooves.
Note that this was the first handle that went wrong but as they are very similar it does not matter
Skive the ends
It is important that the end on the "long" end is a "feather edge" meaning that if is super thin.
Nice and even.
The skived ends makes sure that the thickness of the leather does not become too thick.
Edges in the rounding is beveled.
And burnished.
To help with the shaping of the handle it is nice to have a pliers with smooth jaws.. I do not have one but this will do.
Soak the cover for a few minutes.
Add the D-rings. I covered the long end with plastic to protect it while sliding the d-ring down.
No scratches.
Now the forming can begin.
First press it down with both thumbs along the filler making sure that it is in the center.
Press along both edges with the pliers.
Now use the forming tool to really press the cover against the filler.
Before gluing make lines along the edges so it is easier to put it back together.
Apply contact cement and let it dry. I did not take the filler out just put glue on top of it.
When the cement is dry press together making sure the marks are aligned.
Give a good press along the edge with the pliers.
Ready for sewing
Just a view from another angle.
In both ends mark where you want the stitching to start.
Mark all the way down. I use a two prong pricking iron for this.
Stay right up against the filler.
Stitching done.
Use the wing divider to make marks along the stitching. I made the marks 4 mm away but 3mm would be better.
Cut it. I used a rubber mallet as a cutting surface to help support the curve of the handle.
Cutting done.
I used a dremel to sand the edges.
After the edges have been beveled.
Just to show the profile of the handle.
With the edges burnished.


No comments:
Post a Comment
Note: only a member of this blog may post a comment.