Now the holes are marked with the pricking iron 4,5mm from the edge. Next time I will make it 3,5mm instead.
Because the pocket is not cut with 90° corners I use a square to align it with the edges of the partition board. This results in a pocket that extrudes from the board making it easier to excess.
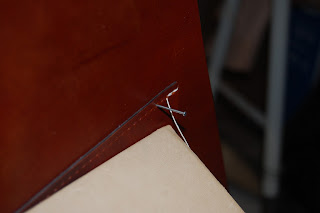
To hold the pocket in place before sewing I punch in small nails. For the pocket I used round nails which of course gives round holes. To avoid this next time I use them I used a dremel with a sanding drum to make the profile diamond shaped.
Sewing on the the pencil holder is done in two steps. First you sew on the edge that's right next to the pocket. Then you place a pen in the holder and punch in a nail to hold it in place before sewing
The main piece divided into two. The big piece is the width of the final briefcase (43 cm). The smaller piece is for the rest.
The height of the partition board is marked with a awl in at least 2 places.
Align the ruler according to your marks an prepare to cut.
When using a utility knife I do not cut the leather in one pass. Several passes with the first being the lightest is necessary. Also I only cut where my hand is holding the ruler to avoid that is slidesMark the corner to cut.
And cut it.
Burnish the top edge
Ready for next step
Just a mock up of the pocket.
The pocket cut to size
To add the cut to the top I made a paper template and marked with an awl
Ready for cutting
For these cuts the round knife is really usefull as it is much easier to see where you are going when pushing the blade as oppose to pulling as you would with the utility knife
Beveling the thin leather with sandpaper grit 180
Stitch line is 4,5mm from the edge. Next time I will make it 3,5mm
Align the edge using a square
Two nails holds the pocket in place.
Start the sewing
With the first few stitching done you can remove the nail
You see that the bottom is not at a 90° angle
Force the bottom to be at the right angle and put a nail in it
Same procedure as last edge
Ready for the pencil holder to be sewn on
The pen holder ready to be sewn on
Tack it.And sew it.
Align the edge with the square and nail it in place while the pen is in place.
The pen scratched the leather when I pulled it out but that is just how this design works.


No comments:
Post a Comment
Note: only a member of this blog may post a comment.