

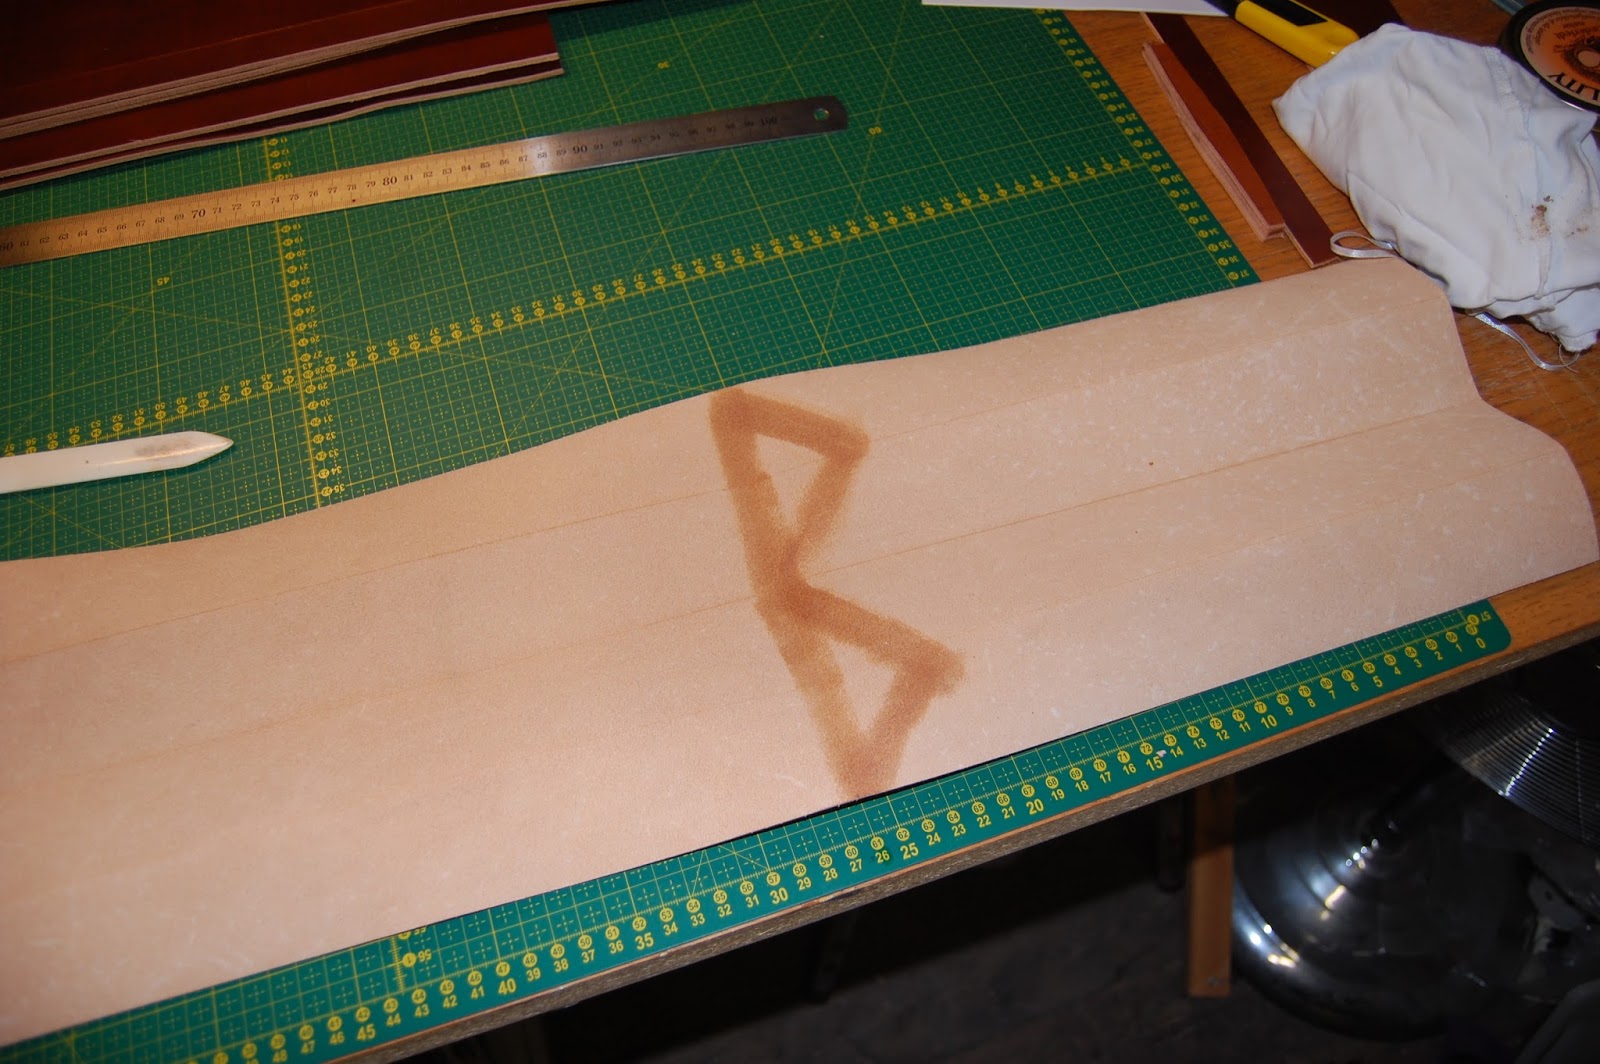
The good news about the gusset is that is it a lot easier to make then you might think. Don't get nervous about making the folds. Things don't have to be super accurate as wet leather is very forgiving.
The gusset piece was cut oversize which turned out to be a very good idea. It had warped quite a bit so I had to trim both sides to get a straight edge.
My steel ruler is 1m long and therefore not long enough to cut the side of the gusset without having to move it. The trick I use to move the ruler is to place a second ruler (in this case a square) right next to it. You then hold the square in place and slide the ruler down where you want it to be.
Last time I made a gusset I used a v-groover to help bend the gusset into shape. This time I will just mark the folding lines and not use the groover. The leather is so thin that this should not be a problem.
With the lines in place you can begin the "pre-folding" to make the actual shaping of the gusset much easier.
With all the lines "pre-folded" the shaping can begin. You start by folding the sides of the gusset up in a 90° angle and then begin to push up the bottom folds. It is not an exact science so you just have to try to make the folds bend the way you want, making constant adjustments.
My initial plan was not to wet the folds. It turned out to be necessary in order to make the tight folds needed. I only wet the "triangles". This made it a lot easier to make the folds.
The corners of the gusset needs to be shaped so that it is possible to sew around them. Using both a bone folder and your fingers you mould the corners, so that there is a edge all around the corner fold.
When the leather has dried you can cut off the ends to the correct length, fold them and sew them. When folding the ends remember to wet the fold line to make it easier.
The gusset piece was cut oversize which turned out to be a very good idea. It had warped quite a bit so I had to trim both sides to get a straight edge.
My steel ruler is 1m long and therefore not long enough to gut the side of the gusset without having to move the ruler. The trick I use to move the ruler is to place a second ruler (in this case a square) right next to it.
You then hold the square in place and slide the ruler down where you want it to be.

Last time I made a gusset I used a v-groover to help bend the gusset into shape. This time I think I will just mark the folding lines and not use the groover. The leather is so thin that this should not be a problem.
Close up of the "triangles"

Almost all lines marked


With the lines in place I began the folding. First I fold the center line


The the two other lines:


With all the lines "pre-folded" the shaping of the final shape can begin. It is hard to explain how to do it. You just try to make the folds bend the way you want making constant adjustments:

My intial plan was to not wet the folds. It turned out to be necessary in order to make the thight folds needed. I only wetted the "triangles"


With the sides adjusted so that they are square I put on some weight to help it stay in place while it dries:


Then I scribe a line and cut of the top 1 cm from this line


I use a bone folder to fold up the edge

Contact cement is applied

After the glue has dried the edge is folded and pressed with a roller

A line about 6-7 mm from the edge is marked
 The holes for the stitching is marked with a pricking iron. Start 7 mm from the edge!

 This is how I hold the gusset


The gusset piece was cut oversize which turned out to be a very good idea. It had warped quite a bit so I had to trim both sides to get a straight edge.
My steel ruler is 1m long and therefore not long enough to cut the side of the gusset without having to move it. The trick I use to move the ruler is to place a second ruler (in this case a square) right next to it. You then hold the square in place and slide the ruler down where you want it to be.
Last time I made a gusset I used a v-groover to help bend the gusset into shape. This time I will just mark the folding lines and not use the groover. The leather is so thin that this should not be a problem.
With the lines in place you can begin the "pre-folding" to make the actual shaping of the gusset much easier.
With all the lines "pre-folded" the shaping can begin. You start by folding the sides of the gusset up in a 90° angle and then begin to push up the bottom folds. It is not an exact science so you just have to try to make the folds bend the way you want, making constant adjustments.
My initial plan was not to wet the folds. It turned out to be necessary in order to make the tight folds needed. I only wet the "triangles". This made it a lot easier to make the folds.
The corners of the gusset needs to be shaped so that it is possible to sew around them. Using both a bone folder and your fingers you mould the corners, so that there is a edge all around the corner fold.
When the leather has dried you can cut off the ends to the correct length, fold them and sew them. When folding the ends remember to wet the fold line to make it easier.
The gusset piece was cut oversize which turned out to be a very good idea. It had warped quite a bit so I had to trim both sides to get a straight edge.
My steel ruler is 1m long and therefore not long enough to gut the side of the gusset without having to move the ruler. The trick I use to move the ruler is to place a second ruler (in this case a square) right next to it.
You then hold the square in place and slide the ruler down where you want it to be.

Last time I made a gusset I used a v-groover to help bend the gusset into shape. This time I think I will just mark the folding lines and not use the groover. The leather is so thin that this should not be a problem.
Close up of the "triangles"

Almost all lines marked

I forgot to scribe the line across.. that's why the gusset is folded at this
point.

With the lines in place I began the folding. First I fold the center line


The the two other lines:

Then the vertical lines. Also it is a good idea to bend all the "triangles":

With all the lines "pre-folded" the shaping of the final shape can begin. It is hard to explain how to do it. You just try to make the folds bend the way you want making constant adjustments:

This made it alot easier to make the foldes:

The corners of the gusset needs to be shaped so that it is possible to sew around them.

With a bone folder as well as your fingers you mold the corners so that there is a edge all around the corner fold:


With the sides adjusted so that they are square I put on some weight to help it stay in place while it dries:

Marking how long the gusset side should be (30 cm in this case) I should have done this before folding the gusset


Then I scribe a line and cut of the top 1 cm from this line


I use a bone folder to fold up the edge

Contact cement is applied


A line about 6-7 mm from the edge is marked


The gusset does not fit into a stitching pony so I use two piecses of wood and a clamp to hold the piece in place


Hi,
ReplyDeleteDid you first make a gusset, then cut the panels for the gusset size? Or how do you determine the distance where beginning of the vertical bends of the one and the other side, if panels are cuts first? Thank you!
Hi,
DeleteI just calculated how long the gusset needed to be in order to fit the panel. I however forgot to take the rounding of the panel corners into account. This means that the current pattern is not 100% correct.
Where it says 30 cm it should instead be 29,7cm and where it says 42 cm it should be 42,4. These are the correct measurements providing that your panel is 43 cm x 30 cm with corner radius of 1,4cm
If to look at your photo, then length between bases of the triangles
ReplyDeleteI dont understand the question :)
DeleteThis specification to the first question)) Thank you! Very helpful!
Delete