Color
Trying to match colors are a pain in the ass. Having said that it's also kind of fun. In this case I had an old mix of color from this bag that when diluted with denatured alcohol gave the right color.Gusset
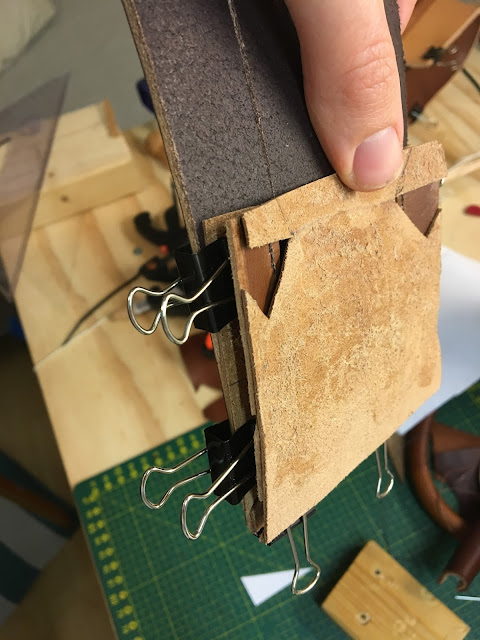
You can find pictures on Ortus's page showing pictures of the different parts of the bag. One interesting feature is how they chose to make the gusset. To help shape it they cut slits and sew it back together to.I tried to mimic this method but using thicker leather than they did I had to change approach. I came up with a rather clever solution but wasn't really satisfied with the result. I don't think the slits suits the otherwise clean look of the bag.
It is possible to just sew the gusset in place without slits or anything done to it. I did this on my first bag and that turned out okay.
The gusset is very flat and what I like about the ortus bag is the more shaped looked. I therefore tried to wet form the gusset and the result was perfect. I shaped a piece of wood on my new belt sander and formed the leather around it before letting it dry without anything holding the shape.
I think the shape is very nice on the wet shaped gusset
Especially the back side is much nicer
It was very easy to glue it in place
Handle
The handle is pretty straight forward but has a rivet going through it which is new for me. I guess they did it to secure a metal strip to help keeping the shape of the bag. This is not necessary at all when using thick enough leather but it does look nice.In order to get the shape of the ends right I had to sew it together before shaping it. Also the rivets and washer had to be placed while the handle was wet to help press it into the leather.
I used a bolt and a nut to push the washer into the handle while it was drying.
Finding the right size of cord to give the handle a round profile was not that easy. Most ropes I found was either too small or too big. I tried to order some leather cord on ebay but the was also too small. I then tried to make my own which actually worked out pretty good but I encountered another problem.
The width of the leather used for the handle is 46mm. I got this by measuring a picture of the original. The diameter of the handle is 16-17 mm which is really hard to archive with a 46mm wide piece of leather so the "handle" part of the handle must be wider. I made mine 48mm wide tapering down to 46 mm at the end. Another thing that is difficult is getting the profile of the handle as circular as possible. With thin leather its not that hard but I use 3mm leather. What I came up with is something rather unsual but it seems to work. I stretch a piece of 10 mm elastic cord so that the diamter goes down to around 8 mm. After that it is much easier to sew than handle around it.
Laptop pocket
The bag needs to have a pocket for a 13" laptop. A pocket is easy to make but because the bag is not that big I would prefer a pocket that was as flat as possible when not used. I had an idea for how this could be archived but I did not think the look matched overall design of the bag.I therefore decided to make a more "standard" pocket. Using thin leather will still allow the pocket to collapse when not in use. Also the laptop is only 1,5 cm thick so that helps to keep everything compact.
Another concern I had was if the leather would tear where the pocket was stitched to the lining. I therefore made a small test piece to check the strength. I actually used even thinner leather for the lining (0,8mm) that what will be in the final bag. To my surprise the leather was not the weak link. The thread snapped first. I had to use a plier to be able to pull hard enough in order to break it apart so I'm confident that this will not be an issue.
Brass bar
I have made a few brass bars for other types of music bags but I no longer have access to a lathe so I had to improvise. I will be using bigger balls and leave out the slot that helps keep the strap in place. I however still have to make a M6 thread on an 8mm rod so I'm really missing the lathe.
Instead I will use a drill and a file and hope it works out.


No comments:
Post a Comment
Note: only a member of this blog may post a comment.