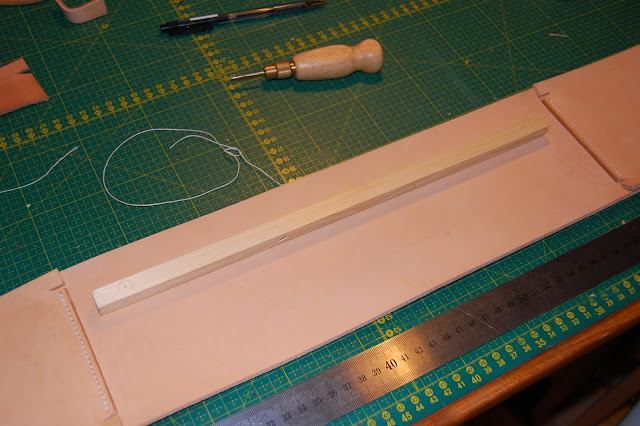
I have never made a gusset like this before so some experimentation was needed to determine the best way to do it. You see that the stitching is on the bottom and not on the side of the gusset as most people tend to do. I prefer having it on the bottom as it gives the side a more sleek look.
The small cut in each end of the bottom gusset needs to be the thickness of the leather. Use the wing divider and set it to the thickness of the leather.
Scribe a line along the each end. The scribed lines along the sides are made 11mm from the edge
Cut the piece
So you end up with this:
Place the ruler 11 mm from the edge
I bought a small utility knife which was able to fix the blade in any position you want. (most utility knifes dont have this option) The cut needs to be deep enough for you to be able to bend the sides on the gusset pretty easy. Find the correct depth on scrap pieces of leather!
Hold the ruler in place and make several small cuts gradually going to full depth. Note that the cut should stop around 1,5 cm from the top edge! I forgot this on the first side which was a shame. It looks much nicer that you are not able to see the cut.
How it should look.
How it should not look. Oops
The normal way to make this cut is using a v groover or a stitching groover. This will work but as you "open" the cut you don't need to remove extra material to be able to bend it.
The bottom of the gusset side is another story. Now you need to "close" the cut so if you dont remove material you wont be able to make a nice bend. First I used the stitching groover to cut a channel as deep as it would go.
I then used a v groover to further remove material from the sides of the cut.
A line 5mm from the edge was scribed and holes were marked. Also the edge was burnished. The top edge of the sides should also be burnished.
Here you see how the side and the bottom should fit together. I made small marks to help position it again.
On the bottom part scribe where you need to apply glue and sand it a bit.
Also sand the inside.
Apply glue
When the glue has set you can sew it. Also you can see that two lines were scribed on the bottom piece where the rails should be.
Both sides are now sewn to the bottom
The bottom needs to have two wooden rails. This is some cheap mockups of pine to help determine where the holes should be. The final ones will be made of oak.
Its hard to see but four dots was made on each line
Now punch the holes and you are ready to glue it to the front.
Two pieces of oak
Drill the holes in two steps
So they end up like this. I used a 9 mm and 5 mm drill.
All holes drilled
The edges was sanded
The chicago screw head was rounded so avoid making scratches on whatever is in the briefcase
All screws in place and secured with loctite


No comments:
Post a Comment
Note: only a member of this blog may post a comment.